How to Choose the Right Rectangular Fly Banners?
Choosing the right Fly Banners Rectangular starts with a simple question: where will people see it? A banner beside a busy entrance needs different dimensions from one displayed on a crowded trade-show floor. Wind, viewing distance, available space, and setup time all affect the choice. Small details matter. A pole that is difficult to secure can turn a polished display into a distraction.
The Outdoor Advertising Association of America reported that U.S. out-of-home advertising revenue reached $9.1 billion in 2023. That figure describes the wider advertising category, not rectangular fly banners alone. Still, it signals sustained investment in reaching audiences beyond screens and indoor media. Visibility is valuable, but size by itself does not guarantee attention. A banner’s message, placement, print contrast, and fabric quality work together.
This guide explains how to compare banner dimensions, materials, bases, and printing options for real-world use. Consider the ground surface before choosing a base: grass, pavement, and indoor flooring may need different support. Check the finished artwork at a distance, too. Fine text can disappear quickly. And bigger is not always better. A tall flag may draw attention outdoors, yet feel awkward in a low-ceiling venue. Even careful planning can miss something; the best choice is the one that fits the actual site, audience, and conditions.
Understanding the Purpose and Use of Rectangular Fly Banners
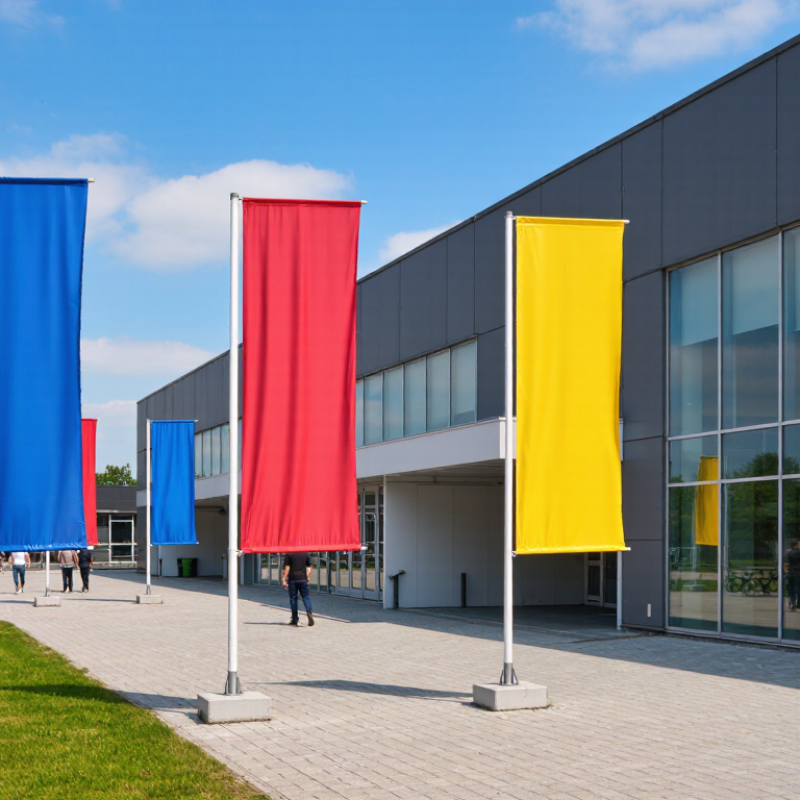
Rectangular fly banners help people spot an entrance, booth, or service point from a distance. Their tall, clean shape gives a short message room to stand out without taking much ground space. They work well beside event paths, outside temporary stalls, and near building entrances. Keep the wording brief: a location name or simple direction is easier to read while walking. That matters. A banner crowded with small text may be visible, yet still fail to communicate.
Choose the setup for the place, not just the artwork. Check the banner dimensions, pole sleeve, and base compatibility before ordering. For outdoor use, consider gusts, uneven pavement, and nearby foot traffic; a lightweight base may not be suitable in exposed areas. Wind changes everything. Indoors, look for a base that sits securely without blocking walkways. I have found that viewing a printed mock-up at a distance can reveal awkward spacing that looks fine on a screen. It is not a perfect test, but it can prevent a costly reprint. Also consider how often the banner will be moved, since frequent handling can affect fabric and hardware over time.
How to Choose the Right Rectangular Fly Banners? - Understanding the Purpose and Use of Rectangular Fly Banners
| Selection factor | What to consider | Practical guidance |
| Purpose and setting | Decide whether the banner will identify a location, attract attention, provide directions, or support an event display. | Use a concise message and strong contrast for roadside or outdoor visibility. For indoor displays, prioritize a size that fits the room and viewing distance. |
| Banner dimensions | Rectangular fly banners are sold in a range of sizes; dimensions and naming conventions vary by supplier. | Measure the available space and check the banner’s finished dimensions before ordering. Confirm that the artwork template matches the selected size. |
| Viewing distance | Text and details become harder to read as the viewer moves farther away. | Keep the main message brief, use large lettering, and avoid fine print when the banner will be viewed from across a street, parking area, or event space. |
| Fabric and print | Outdoor exposure, handling, and repeated use can affect fabric and print appearance over time. | Ask about the fabric, print method, care instructions, and suitability for the intended conditions. Follow the supplier’s guidance for cleaning and storage. |
| Pole and mounting system | Rectangular banners may use sleeves, pockets, or other attachment points, depending on the design. | Check the attachment style, pole dimensions, and included hardware. Make sure the banner and pole system are designed to work together. |
| Wind and placement | Wind can place strain on a banner, its pole, and its base; conditions vary by location and weather. | Choose a base suitable for the surface and follow the product’s wind-use instructions. Take the banner down in conditions that exceed the supplier’s stated limits. |
| Artwork layout | Sleeves, seams, and hems can reduce the visible print area or cover parts of the design. | Use the supplier’s artwork template, keep important text and logos clear of edges and seams, and review a proof before production. |
| Portability and reuse | Frequent transport calls for a setup that is easy to assemble, pack, and store. | Check the packed size, assembly steps, and whether a carry bag is included. Store the banner clean and dry to help prevent damage. |
Note: Banner sizes, hardware, and operating limits are not universal. Confirm specifications with the supplier before purchase.
Assessing the Display Location and Environmental Conditions
Before choosing a rectangular fly banner, visit the exact spot where it will stand. Measure the available width and height, including nearby doors, signs, and walking routes. A banner that looks clear in an open field may disappear beside a tall display or tree. Check viewing distance, too: small lettering can blur when people see it from across a parking area.
Wind changes everything. On exposed pavement, at a beach, or beside a building corner, gusts may twist the fabric or strain its support. Look for sheltered ground and a base suited to the surface, such as firm soil or hard flooring. Indoors, check ceiling height, airflow from vents, and whether the base could block a busy aisle. Rain and strong sunlight can also affect fabric and printed colors over time, so consider how long the banner will remain outside. A cloudy-day inspection is useful, but it does not show how bright sun will wash out pale graphics. I have found that site measurements can be off by a few centimeters, so leave some clearance rather than planning a perfect, tight fit. When conditions vary, a smaller banner may be easier to position and keep stable.
How to Choose the Right Rectangular Fly Banners?
Assessing the Display Location and Environmental Conditions
Sheltered entrances and enclosed courtyards generally offer lower wind exposure than open plazas or exposed roadside and waterfront locations. These ratings are qualitative planning estimates, not measured wind data. Check local conditions and the banner hardware’s wind guidance before installation.
Choosing Banner Size, Fabric, and Print Specifications
Choose the banner height and width for its viewing distance, not just the available pole. A banner beside a pavement needs readable lettering from a few metres away; one viewed across a car park needs larger type and stronger contrast. Allow room for the pole sleeve, hems, and a safe margin around important text. There is no perfect formula. Wind exposure and the banner’s movement can change what works.
Fabric affects both appearance and durability. Knitted polyester is light and flexible, while heavier or blockout fabrics can reduce show-through in bright settings. Ask the printer for the fabric weight, finishing details, and a full-size sample or proof. Specify the finished dimensions, bleed, colour profile, and image resolution at actual print size; around 100–150 ppi is often a practical target for large graphics viewed at a distance. Grand View Research estimated the global digital-printing market at USD 35.5 billion in 2023 and forecast 6.2% annual growth from 2024 to 2030. That market figure is not a banner specification, but it reflects the expanding role of digital production. Check the proof in daylight, too. Screen colours can be misleading, and I would still revisit any design whose small text looks cramped.
Selecting a Compatible Pole and Ground Base
How to Choose the Right Rectangular Fly Banners?
Selecting a Compatible Pole and Ground Base
A rectangular fly banner needs a pole that matches its sleeve, not just its height. Check the pole diameter, connector shape, and listed banner size before ordering. A loose sleeve can twist around the pole; a tight one may strain at the corners. The base matters just as much. Choose one designed for the pole and suitable for the surface, such as firm soil, pavement, or indoor flooring. A narrow base on soft ground can wobble. Small detail. Big difference.
Wind ratings deserve careful attention. ASCE/SEI 7-22 provides location-specific wind design data, so a general claim like “wind resistant” cannot tell you how a setup will perform at your site. The National Weather Service’s Beaufort scale describes 19–24 mph winds as moving large branches, and 25–31 mph winds as moving whole trees. These are weather observations, not safe operating limits for banners. Use the pole and base manufacturer’s stated limits, and bring the banner down when conditions approach them. I would not rely on appearance alone.
Tips: Match the pole’s diameter and connector to the banner sleeve. Check the base’s surface compatibility and capacity, then test the assembled banner in calm conditions. If the fit feels forced, pause and recheck the specifications. A quick fit test can catch a frustrating mismatch.
Checking Artwork, Portability, and Ongoing Care
A rectangular fly banner is usually read while people are walking, so artwork needs to communicate quickly. Use a short headline, strong contrast, and generous spacing around the edges. Keep essential text away from seams and curved sections, where it may distort when the fabric is tensioned. View the design at full size before approving it; details that look clear on a laptop can disappear across a busy parking area. Less can feel unfinished. That is sometimes the point.
Portability depends on the complete kit, not just the printed banner. Check the packed pole length, total weight, carry bag, and base before choosing a size. A compact frame may fit in a car trunk, while a larger base can be awkward to move between events. I have seen people focus on the display height and overlook setup time. Rehearse assembly once at home, and make sure the parts are easy to identify.
Care affects how well a banner presents over repeated use. Let damp fabric dry fully before packing it, since trapped moisture can cause stains or odors. Brush off loose dirt, then follow the maker’s cleaning instructions rather than scrubbing printed areas aggressively. Inspect pole joints, fasteners, and the base before each outing. Small wear is easy to miss. Replace damaged parts promptly, and store the kit away from sharp objects and prolonged direct sunlight.


